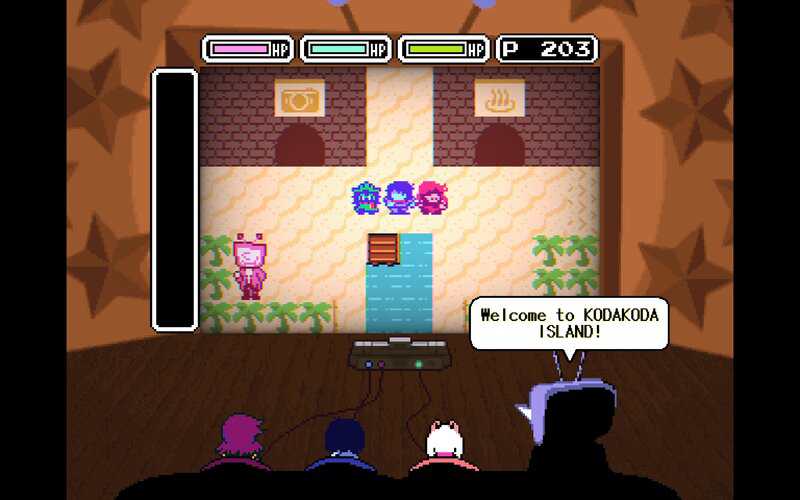
Welcome to KODAKDA ISLAND!
Table of Contents[Hide][Show]
TV TIME continues into Round 2 in Deltarune: Chapter 3. Tenna doesn’t want the credits to roll just yet, and you’ll enter another 8-bit adventure on a tropical island looking for love. To escape this challenge, you’ll need to find hidden GRAND PHOTOS and reunite lost lovers. It’s a weird little adventure and the trickiest part is earning S-Rank. If you want the best score and the best rewards, here’s what you need to do.
Getting The Camera

From the Green Room, go left and interact with the Studio door to begin Round 2. This round is similar to the previous one — you’ll be ranked at the end, so you’ll want to collect as many points as possible and find everything.
From the starting room, go to the left door entrance to find three podiums and a camera. Collect the CAMERA — press interact to aim and take pictures. There are four photos you’ll need to take to get the best possible score. You only need three, but we’ll explain how to get all four.
Before leaving the cave, go left of the podiums through a new doorway to find Pippins with clues.

- Clue #1: The plant of spikes, hides in the forest. It’s no rose, but its thorns hold love.
- Clue #2: A green geyser, just next door. Who can dig it up?
- Clue #3: The red antlion, under the ground. Fangs of youth, unearthed with a photo.
- Clue #4: A flower torn in half! I wonder who took it… the photo, I mean.
To progress, we need to find three out of four photos. To get the best score, you’ll need all four.
How To Get The First Photo

From the starting area, go left. You’ll encounter your first enemies here — this area is guarded by Pippins.
- ENEMIES: Pippins
- Use Ralsei and Susie’s R-Action and S-Action to take off 50$ Mercy. Use both on a single enemy to turn their name YELLOW and SPARE them.
- Kris can use BET. You’ll need to touch the dice when they turn green during an attack, which can be tricky. This deals 35% Mercy damage.

To the left, you can go up to find the binoculars or go down. When going down, look to the right of you — there’s a cactus in the middle of the palm trees. Take a photo of the single cactus to gain one of the GRAND PHOTOS.
How To Get the Second Photo

Go down the central water path from the start and stick to the right side. This leads to a vendor area with Lancer being sold for 999 points.
- How To Buy Lancer: Use the CAMERA and take a photo of Lancer with the price in the frame. This will remove two numbers and only show a “9”. Now you can buy Lancer for 9 points.

Purchase Lancer, then take him back to the starting screen. Enter the door to the right and Lancer will automatically dig up the green geyser. Take a photo of it to gain the second GRAND PHOTO.
How To Get the Third Photo

From the start of the board, go right from the geyser room ad use the raft to reach the lower dock. Take a photo of the camera-shaped block to make it disappear and continue down to find a puzzle. Susie will automatically solve the bridge puzzle below and let you cross to the right.
- Bridge Puzzle Solution: Past the first automatic puzzle, you’ll encounter a puzzle Suzie makes you solve yourself. Use the bell button in the corner to reset the puzzle if you get stuck.

- To solve it, recreate the screenshot here. Collect the bottom bridge and use it on the small gap between the top two bridges — the use one of those two to create a path to the right-most bridges. Both of the right-most bridges are on land, so you only need three bridges to reach the other side.
Down below past the puzzle, you can enter an optional room. While playing as Susie you can choose to wear a Ribbon or Pizza Deodorant. This leads to a special interaction but it isn’t necessary. Either way, you’ll continue right and encounter a trio of Pippins.
- NOTE: As Susie, interact with every weed to gain +5 points. Pull blue flowers to get +20 points.

Go up and right to find the half-flower. Take a photo of it to gain the third GRAND PHOTO. This may also happen automatically depending on your actions or if you allow Ralsei to continue playing as Kris.
How To Get the Fourth Photo

After taking a photo of the half-flower, go up and left to reach a very simple puzzle. Move the two bridges on the sand square to cross over and reach the stairs into the underground cave.
Pressing the button, Susie will swap characters and set off the bombs. This reveals a room down where antlions move around. Wait for a red antlion to appear and take a photo of it to gain the last GRAND PHOTO.
Using The Raft

Go back to the Photo Podiums to automatically place the GRAND PHOTOS and unlock a magic raft that gives you access to the full ocean. There’s a lot to see here but only one direction you really need to go.
- Bottom-Right: Go to the bottom-right corner to find a secret island that has seemingly no purpose. If you interact with the one colorful tree on the heart-shaped island, they’ll start to change colors!
- Bottom-Left: There’s a dock that leads to a lawnmowing mini-game. Play it to earn a lot of free points.

- Top-Left: Going up on the left side leads to a special interaction where the game glitches out. Don’t stop going up!
- Top-Right: Leads to a strange dock with no current purpose. Remember this area for later.
To progress, use the raft to reach the island on the lower-left where Elnina is located. Talk to Elnina and she’ll enter your inventory — now you can complete this board. There’s just one problem on the way out. You’ll encounter a special boss called Shuttah.

- BOSS: Shuttah
- Shuttah is a weird-eyed boss monster that challenges you to use your camera skills.
- Ralsei and Susie can use R-Action and S-Action every turn to deal 5% Mercy damage.
- Use Kris and ACT -> ToughPhoto, EasyPhoto (Ralsei) or PowerPhoto (Susie) to deal higher Mercy damage. PowerPhoto costs 25% TP.
- The type of photo will be randomized. ToughPhoto challenges you to take a photo very quickly. EasyPhoto with Ralsei often requires you to time your photo precisely — if you get Lancer, prepare your camera to be slightly above Lancer, as he’ll only stick out his tongue mid-jump.
- A PowerPhoto challenges you to take a photo between many different options, so watch and make sure to get the right image. You’ll deal +10% Mercy if you get a successful photo.
And that’s it! Keep taking photos. At the end of the fight, you’ll be challenged to take a photo of all your party members. Do it when they huddle together to win the battle and end the fight peacefully.
Completing Board 2

Return to the start of the board and travel north. You’ll automatically use Elnina and create a bridge — not exactly a rainbow bridge — to the level exit. This leads to a simple rhythm minigame. Susie will purposefully ruin your score, so you need to play well to keep your meter up. You don’t have to be perfect, though.
Get as good of a score as you can. As long as you earn a B-Rank or higher on all the battles and collected as many points as possible while exploring, you’ll earn an S-Rank at the end of the round. Like the previous board, getting the fourth photo is a huge boost.
Go to the counter to collect your reward for earning S-Rank. You’ll gain the WHITE RIBBON. This armor item increases defense but lowers magic, making it ideal for Kris who doesn’t have magic anyway. You’ll also be able to enter the Round 2 S-Rank door and complete another cryptic puzzle.